
Up until a year or so ago, my method of grilling steaks had always been fine – I worked the ‘hot spots’ of my coals and produced many tasty treats. One thing I came to realize though – is that I never really thought about the presentation of my grilled meats. They tasted grilled – but they didn’t really LOOK grilled. What I mean by that, was that I didn’t have the quintessential grill marks on my food. If you google steaks (Link Here) and select the ‘images’ section, you will see amazing looking steaks, and one common theme – grill marks.

Why did I never think this was an important part of my finished product? I suppose I was more concerned with the done-ness of my steaks over the appearance of my steaks. Well now that I can basically cook a steak in my sleep, I realized that marks were the next step in my growth as a BBQ master. Youtube has tons of videos on how to achieve grill marks… I took to my grill and tried to achieve results, and I think I’ve finally cracked the code.
Sous vide isn’t necessary, but for this demonstration, I took a pack of delmonicos that I scored for $8, and sous vide at 123 degrees for about 30 min because of how thin they were. In hind sight, I wish I would have given them the full hour – because the large ribeye fat would have broken down a little more – that was my only regret.
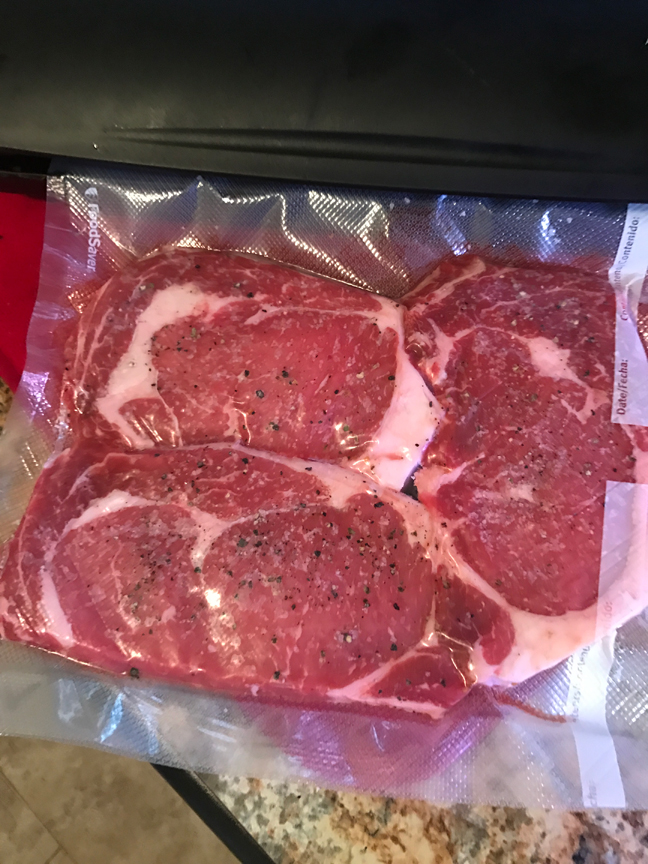
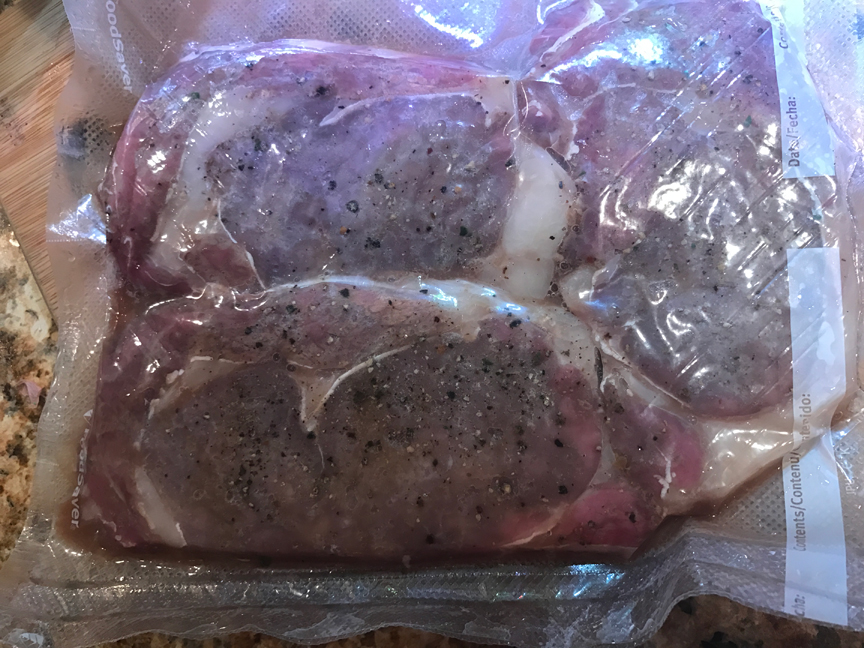
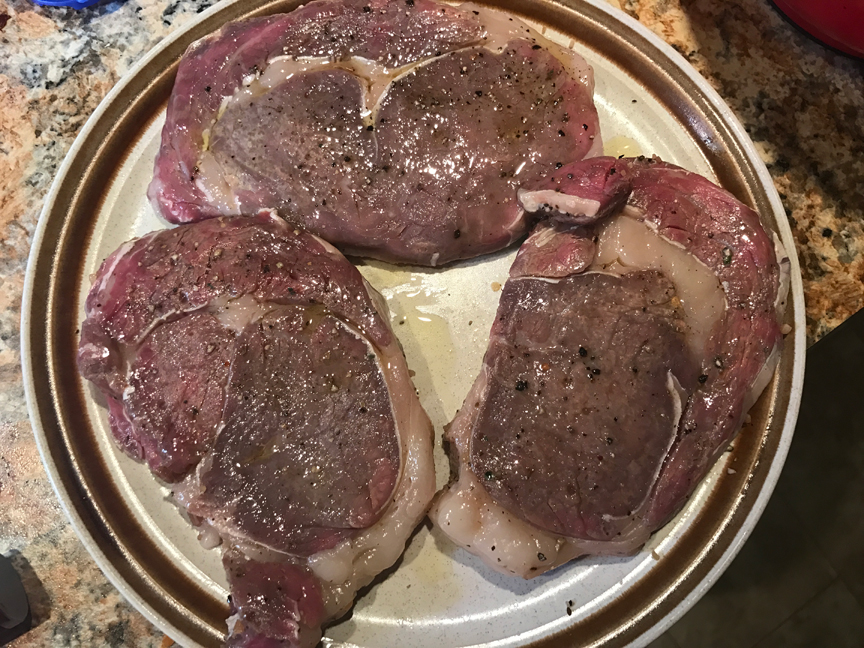
I dried them off very well – which is a CRITICAL step in achieving post sous vide grill marks, then applied olive oil to the surface, and rubbed it evenly into the meat. You can see, the fat is cooked, but it’s not quite there.
The next step is to have a super hot fire going. The flames are leaping higher here than when I put the steaks on – but this is what you’re looking for.
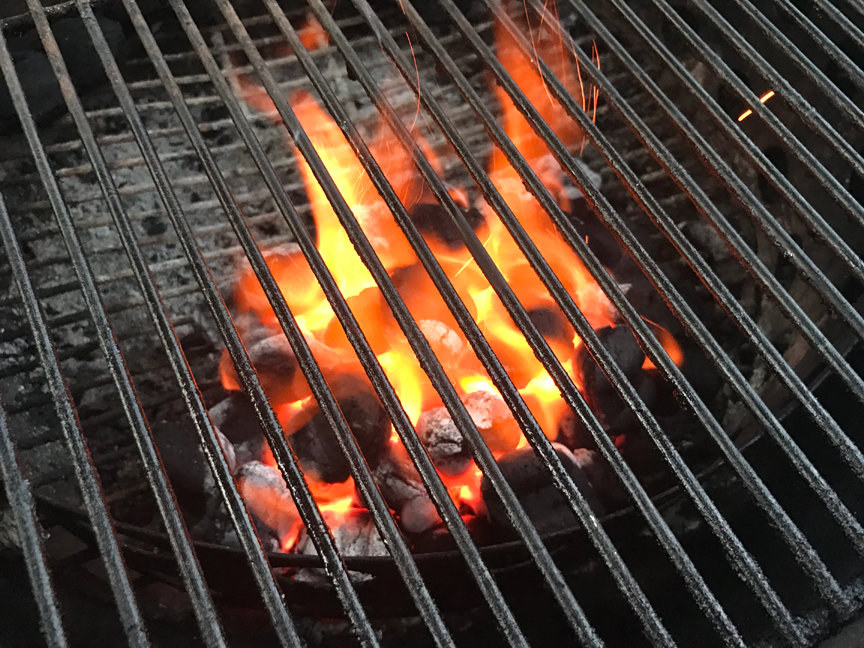
I only built a small concentrated fire for this, because I would be searing each steak independently, then moving it to the side to keep it warm.
On goes the steak – but the critical step that 99% of the youtube videos out there do not tell you – is to press the steak onto the grill with your tongs, working each portion of the meat into the grate.
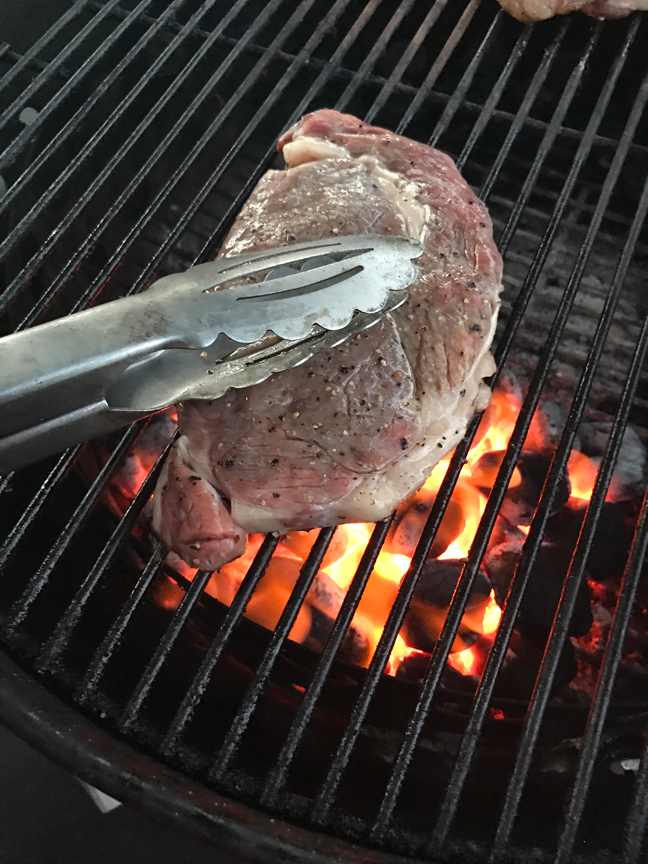
You need contact with the grates to get the marks – it’s an absolute must.
Now, at the 40-second mark (counting in my head), I picked up the steak and turned it 90 degrees. This will give me the ‘cross-hatch’ pattern that you saw if you clicked my link to the ‘steak’ search – just a nice sexy look for a steak. Another 40 seconds, and it was time to flip:
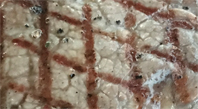
BOOYAH!
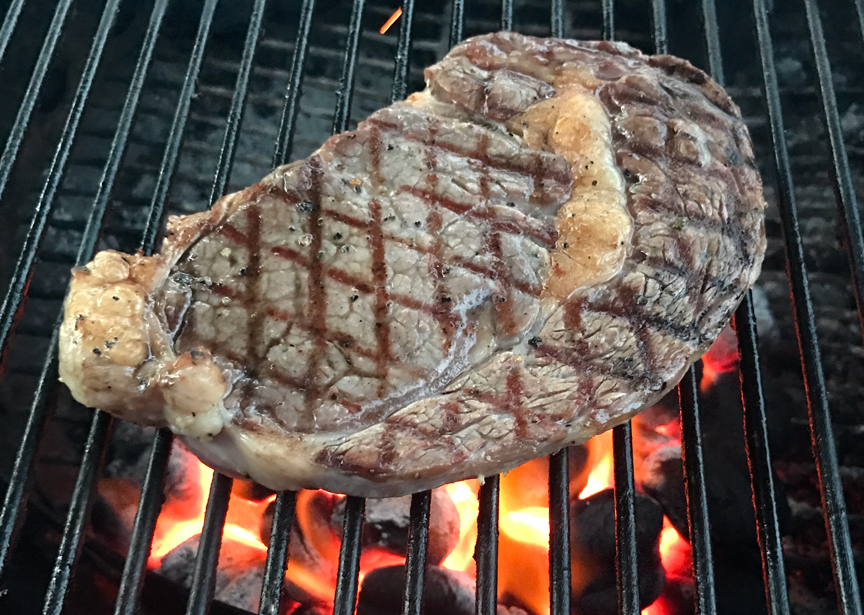
Exactly what I was looking for. I did the same thing on the other side with the 40/40 – and did it to the other 2 steaks – check it out:
Marks Marks Marks!
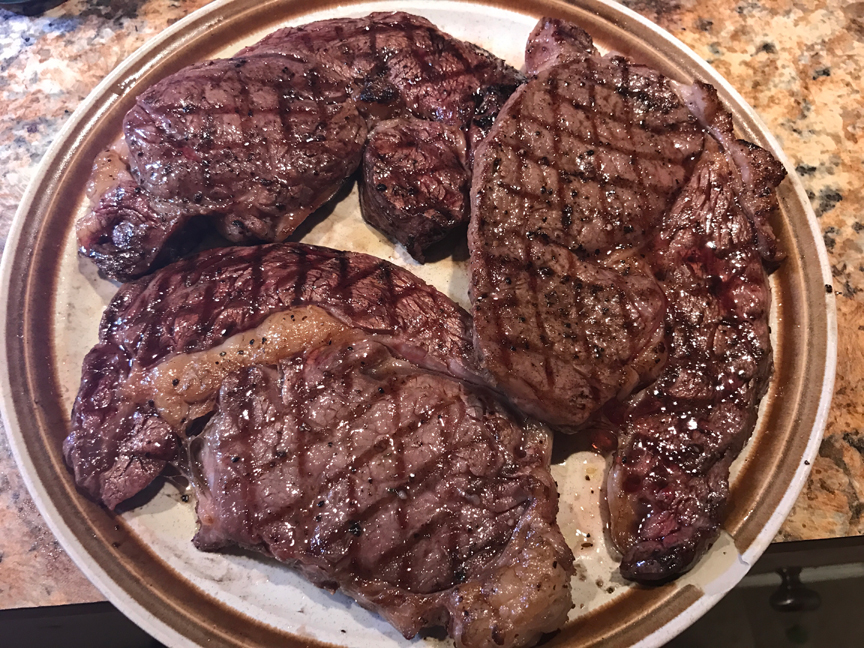
Practice absolutely makes perfect here, so do not get discouraged if you don’t get killer marks. This is probably the best I’ve ever done.
Let’s recap:
– sous vide the meat
- Season the meat (salt pepper)
- Sous vide the meat
- Dry the meat thoroughly with paper towels.
- Oil the meat
- Grill the meat
- Push meat into grates while cooking
- Count in your head
- Rotate 90 degrees for cross hatch, or don’t
- Repeat on other side
- Repeat for each steak
- EAT THE STEAAAAAAAK!
enjoy!